Results 1 to 13 of 13

Thread: Part 20 – Wiring

Hybrid View

Previous Post Previous Post   Next Post Next Post
  1. #1
    Join Date
    May 2005
    Location
    Roseville, Ca., USA.
    Posts
    523

    Part 20 – Wiring

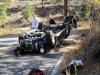
    One major job yet to be done on the car was the wiring or should I say rewiring. What I had to work with seemed to be quite a mess as illustrated by the following photos.


    I was able to get my hands on a wiring manual for a 2003 Unique 427 (thanks Phil) and was glad to find out that the wiring in my car matched (for the most part) the wiring in the manual. I still had some differences to deal with (MSD box, dual fans with relays, oil pressure light, etc.) but the manual made most everything make sense. I discovered early on that the harness had plenty of wire included and decided to custom tailor it to my car. I shortened wires and replaced connectors and reworked pretty much everything. Here is the result for the dash area.


    ]

    To get to the rear of the car I decided not to go through the tunnel. I ran a conduit under the passenger side door, through the wheel well and into the trunk.

    ]


    All wiring to the engine and cooling fans is through one hole in the front right of the tunnel and along the frame rail.


    Headlights, turn signals, brake wiring and horns are concealed on the left side and across the front.


    To be continued…
    Last edited by RJacobsen; April 21st, 2010 at 03:18 PM.
    Rod
    Roseville, Ca.
    289 FIA #9152 "The Flintstone Cobra"

  2. #2
    Join Date
    Jan 2003
    Location
    Harrisburg, PA, USA.
    Posts
    657
    Time well spent. Very much improved.

    - Geary

  3. #3
    Join Date
    Nov 2003
    Location
    Mississippi Gulf Coast and Central Florida
    Posts
    2,153
    Nice work Rod... love the heat shields, too.
    Paul

    289 USRRC
    1964 289 5-bolt block
    Toploader and 3.31 rear

  4. #4
    Join Date
    Sep 2003
    Location
    Roseville, CA, USA.
    Posts
    2,323
    Looks really good!

    BTW - EUROSunday at Nugget Market this Sunday, if you are interested - http://eurosunday.net/sacramento/index.html
    Phil

    427 Roadster, #4279436
    FE Specialties FE
    3:31 and Toploader (wide ratio)

    Roseville (N.Cal)

  5. #5
    Join Date
    Apr 2010
    Location
    Navarre, Florida
    Posts
    284
    You're sure giving me many ideas for my upcoming build. I've gone through all your posts and they are very helpful and inspiring! I do have a few questions .... you have a gauge or something on the far right side of your dash.... what is that? Also, do you think it would be easy to replace the vinyl on the dash with aluminum? Thanks Mark
    427 S/C, Flame Yellow, B2 Motorsports 427ci Stroker Dart SBF, TKO600, 3.73 Posi, Avon tires and so much more.

  6. #6
    Join Date
    Jan 2003
    Location
    Gadsden, Al , USA.
    Posts
    1,543
    Rod is rebuilding a older 289 FIA car that had been altered into a race car, his build is totally different than a new kit build. The original FIA cars had the speedo on the passenger side so the driver wouldn't look at it, the 427 cars and 289 street cars didn't have that option. The problem with a aluminum dash is when the sun hits it you go blind, I had a customer go with aluminum but later painted it black.

  7. #7
    Join Date
    May 2005
    Location
    Roseville, Ca., USA.
    Posts
    523
    Quote Originally Posted by mkassab View Post
    You're sure giving me many ideas for my upcoming build. I've gone through all your posts and they are very helpful and inspiring! I do have a few questions .... you have a gauge or something on the far right side of your dash.... what is that? Also, do you think it would be easy to replace the vinyl on the dash with aluminum? Thanks Mark
    As Allan said the gauge you see is the speedo. As to the dash it would not be hard at all to overlay it with aluminum but Allan has a good point, the scotch brite would probably help but I think a bigger problem comes with keeping it looking good. Raw aluminum starts to oxidize almost immediately after you polish or scotch brite it, and with all the switches, gauges, lights, ect it would be difficult to maintain without a protective coating on it.
    Rod
    Roseville, Ca.
    289 FIA #9152 "The Flintstone Cobra"

Posting Permissions

  • You may not post new threads
  • You may not post replies
  • You may not post attachments
  • You may not edit your posts
  •